|
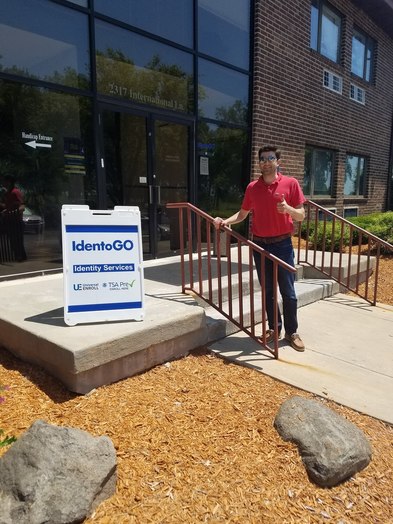
With record numbers traveling each year, saving time at the airport is one way to help reduce time and stress. Now that we have a daughter in tow, this has become even more important. After barely making our flight for the Spring Break Cruise, I decided that it would benefit our family to explore getting TSA Pre-Check. For those that aren't aware, TSA Pre-Check allows a traveler to skip the main security line to go into a terminal when flying. You don't need to remove shoes, liquids, laptops, light jackets, and and belts. According to the TSA website, the average wait time is less than 5 minutes. Not bad for a little work on the front end! Step One: Online ApplicationFor me, the obvious place to begin was a Google search. Here is the top search result (which happens to be the right one): TSA Precheck. Simply click on it, and there are a few screens worth of information to fill out. Don't stress, it isn't difficult. At the end, you'll have the option to select a site for the in-person interview. For those of you reading this in the Madison, WI area, there is a site here. In the past, the closest place was either Rockford, IL or Milwaukee, WI. I was happy to see that I wouldn't need to drive an hour to have in-person part. Step Two: In Person Background CheckThe Madison, WI location was pretty open in regards to times to select. We chose to go at noon on a Friday. At one point, the TSA precheck was actually being done at the Madison Airport. However, that has since changed. The location is in an office building very close to the airport. Even though we had the address, we definitely got turned around once or twice! We finally found it. I wasn't able to take pictures inside the offices, but they were pretty generic. The employee that helped us was friendly and knowledgeable. Sandy and I both went in together, and took about fifteen minutes total. She asked basic questions about names, date of birth, location of birth, etc. There was a tool where she took our fingerprints. It felt routine. Make sure you bring all your forms of identification with you (for us it was a drivers license and passport). As well as a form of payment. They did take American Express credit cards, which is always a plus in my book. Step Three: Email ConfirmationAt our appointment we were told that we would be getting an email confirmation within a week that you are eligible for TSA Pre-Check. I received mine within one business day. Once I checked my status, it showed my Known Traveler Number. Sandy never received an email. We both thought this was strange because we applied at the same time, and had our in person appointments at the same time. After a few days I told her just to check her status. Sure enough, she had been approved. I was able to take our Known Traveler Numbers, and add them to our frequent flyer accounts. That way, when we fly next time, we'll be able to go through the TSA Pre-Check line. Lastly, a few of you that follow along might wonder why we didn't have to get anything for our daughter. That's because family members ages 12 and under traveling with an eligible parent or guardian with TSA Pre-Check can go through the expedited screening with them. Have any questions about travel, or interested in upcoming trips? Let me know!
Share the knowledgeComments are closed.
|
From your
|
Connect[email protected]
(518) 573-6220 (608) 618-2897 Based in Madison, Wisconsin. Happy to connect wherever you are. |
Florida Seller of Travel Ref. No. ST15578
CST 2090937-50 Washington UBID No. 603189022 Iowa Registered Agency No. 1202 CST #2111810-40 Terms and Conditions
Managed by Voyager Websites |


 RSS Feed